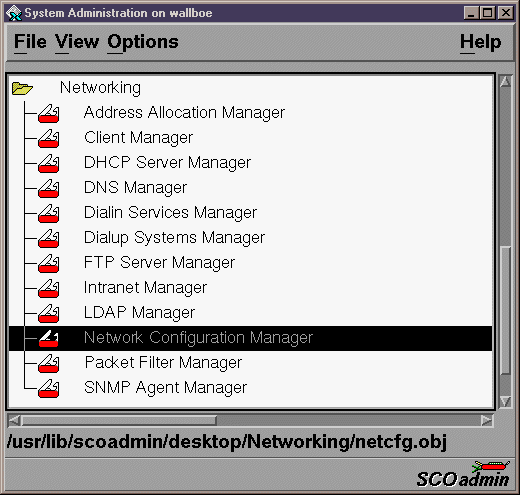
This is how to setup PPP on a UnixWare7 Server, from scratch. The example below is how to do so for Wallington's machine. To begin, launch the "scoadmin" utility. The process below assumes you have done at least this much already....
This is the initial screen that is brought up by "scoadmin".

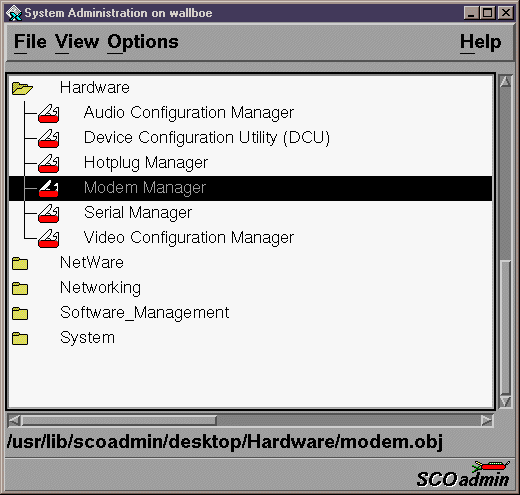
We should add the modem before we do the PPP because sometimes, once we are in the PPP setup, we cant add the modem. Then we have to exit out and do it this way anyway. Therefore, lets just start that way, and avoid the possible problem later.
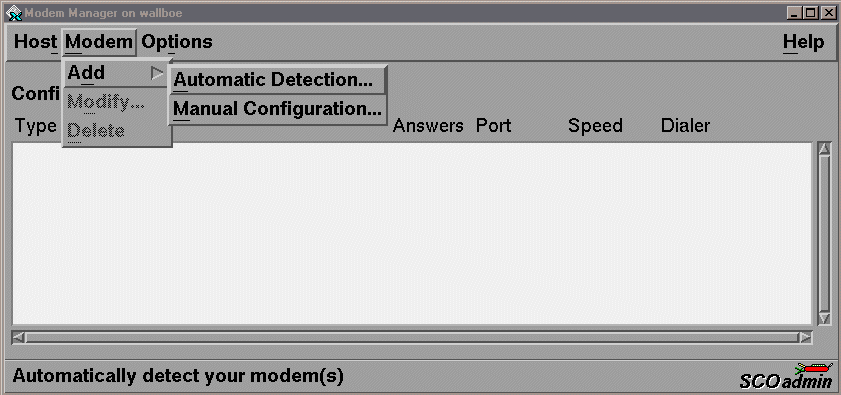
Once in the modem manager, lets add a modem. I always try to let the machine find the modem for us, if it can. We click on "Modem", then "Add", and select "Automatic Detection".
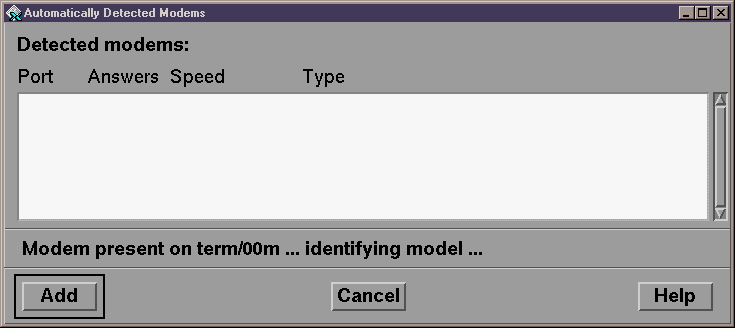
Pay attention to the messages at the bottom of the new screen. This one states that if found a modem on term/00m. It then tries to determine what type of modem it is. In this process it will check against the current database of modems it has. This list will be increased with each successive version of UnixWare7, but for right now, our external Sportster modem is not detected.
Now we will go back to "Modem", "Add" and this time choose "Manual Configuration". We know what kind of modem it is, since it is external (always a good idea on a server - for resettability), and we have the identification right on it. It is a 3com/USRobotics 28800 Sportster External modem.
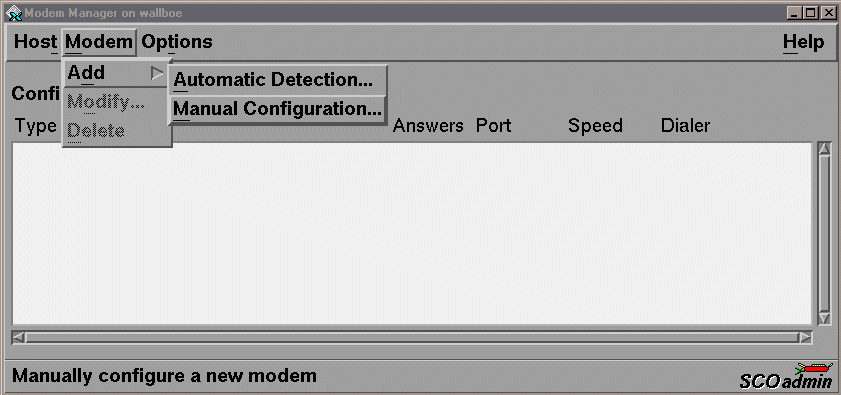
The following box will appear, from which we can select our modem. I would also recommend checking the port status while here. It is easier than the other method, of exiting this screen, going back to the "scoadmin" screen, under hardware, choosing the serial manager, and using that.
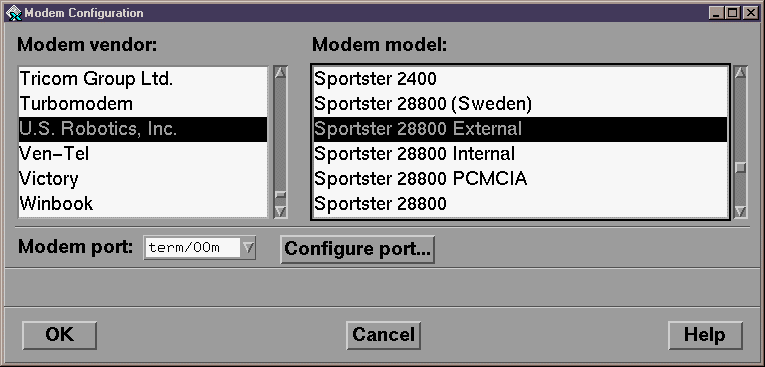
This is the serial manager section of the modem add screens. I notice that the digi concentrator ports are not recognized in this tool. I dont understand why, so we must install the modem on the onboard serial port. We will use com1 for this. Always make the modem/serial port, incoming only. The current version of UnixWare7 (castor) version 7.0.1 does not support incoming and outgoing. In our situation, outgoing makes no sense, so that leaves us with incoming only. Always set the baud to be a speed higher than the maximum the modem can handle.
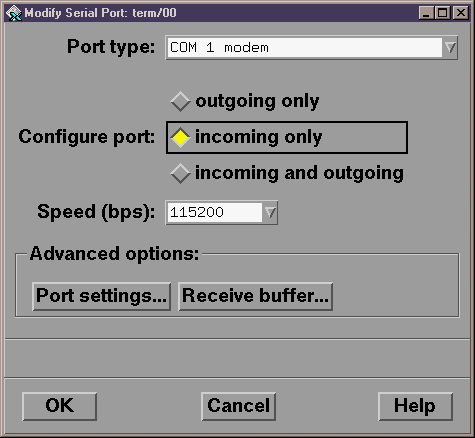
At this point, click on the "Port Settings", and set the data/parity bits. The default of 8/1/N will be fine. .
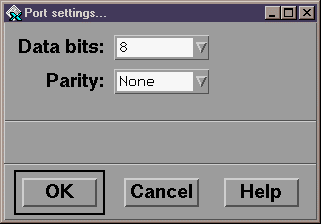
After clicking on "OK", we find that the modem manager updates itself to show the newly configured modem. Make sure that all the settings are correct. "Yes" for answers, indicates that the incoming only was properly selected. "Port" of "term/00m" indicates that com1 modem was properly selected. "115200" indicates that a speed higher than any currently available modem is set up properly. "Dialer" of Sportser_28800 show that the correct modem string is used.
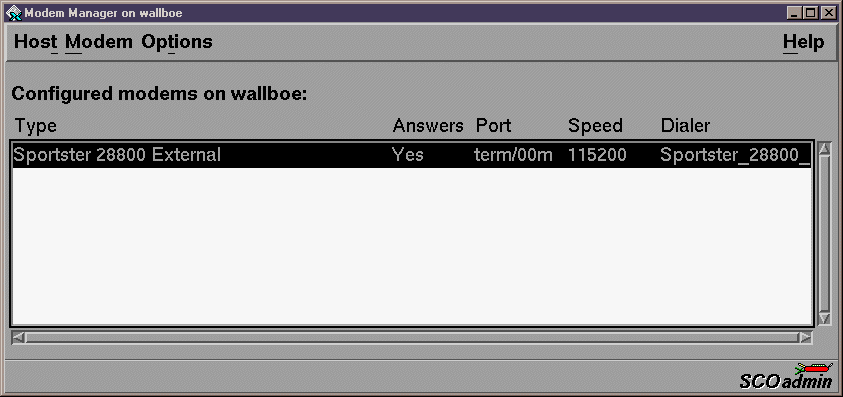
At this point, we can exit the modem manager. This completes our need to use the modem manager and serial manager. This would need to be repeated for all additional modems in a similar fashion.

Now launch the "Network Configuration Manager" from the "scoadmin". This is where we will begin our PPP work. For us to be able to do this however, we must switch from "LAN" to "WAN" view. "LAN" is the default view, and most problems I have seen, involve people not knowing how to bring up the "WAN" view..
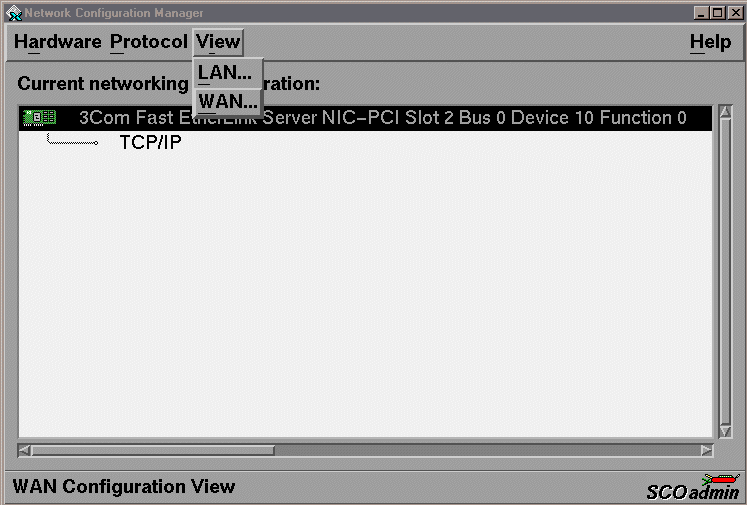
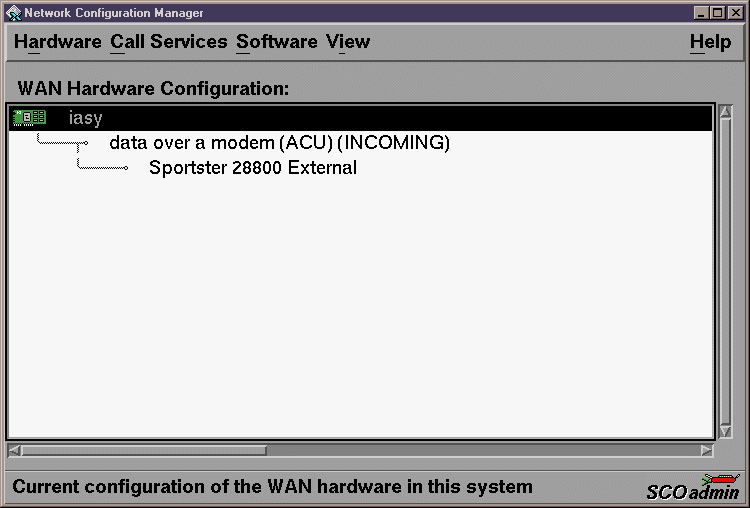
In "WAN" view mode, all of the currently installed serial cards are show. Again, in our case, we only see the onboard ports, on the "iasy" serial card (actually on the motherboard itself). We are awaiting an answer from Digi as to why their 128-port C/X PCI card is not recognized. I had a similar problem with a 16-port Xm card.
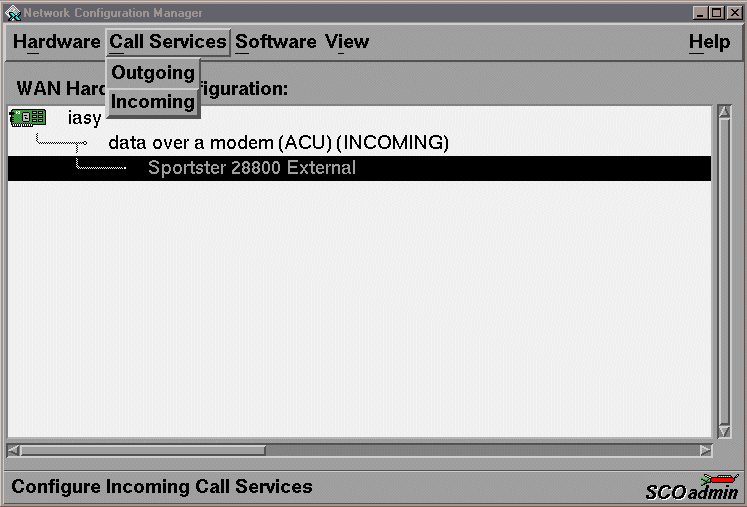
Now we must create the Incoming call service. This is done by clicking on "Call Services" from the menu bar, and then "Incoming". This of course, is in step with our incoming only version of our bundle, and modem.
We will add a "service" for our incoming dialup ppp session, by clicking on "Services" and then "Add".
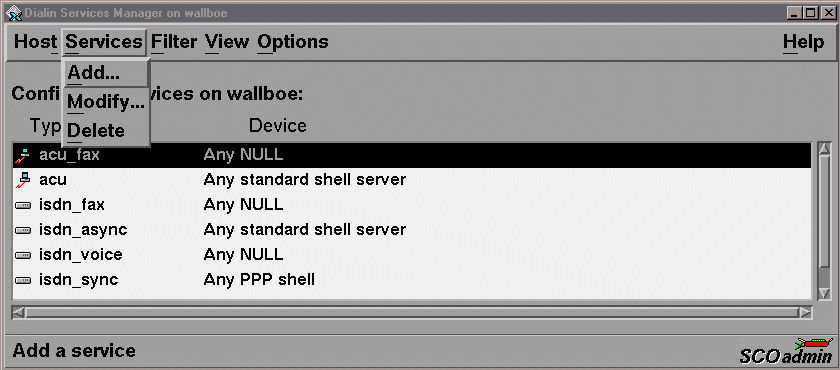
Lets allow the service to be "data over a modem", and restrict it to "term/00m" for our example. If we were going to do multiple modems, we could change this to "any device". And lastly allow the service path to be "PPP shell" and from any phone..
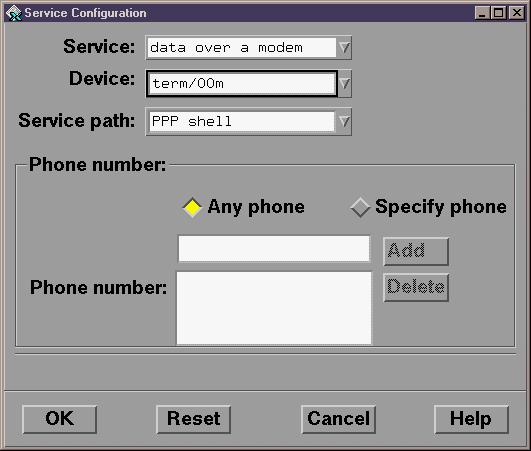
After clicking on "OK" from above, we see the newly created "ACU" service available. It is for pppsh over the term/00m device.
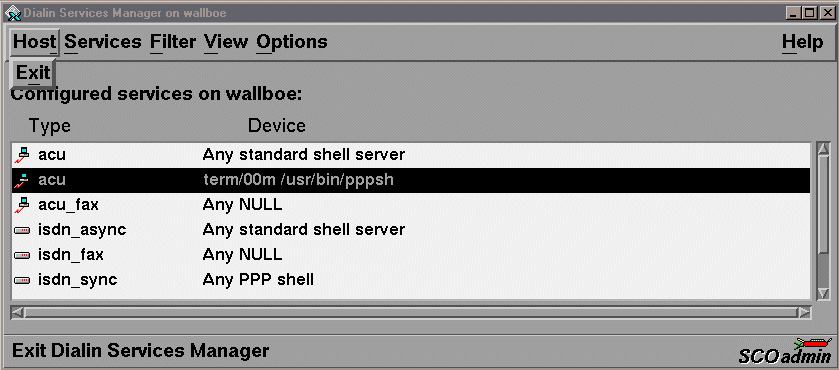
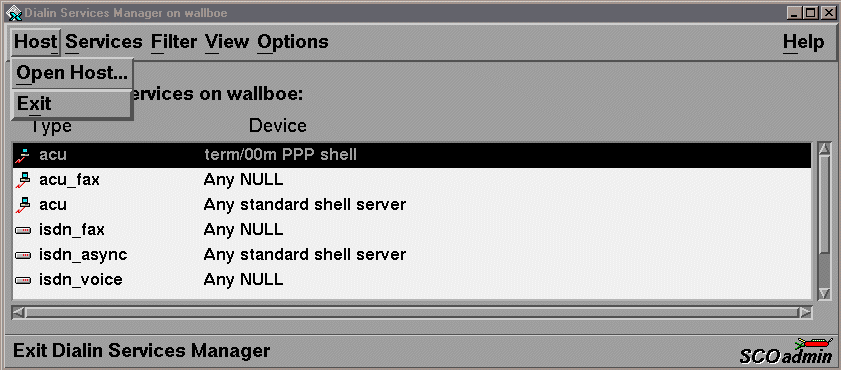
Now lets exit this manager by clicking on "Host" and then "Exit".
What we need to do now, is to begin configuring PPP. To do this, we need to click on "Software" and then "Configure PPP...". Seems simple enough .....
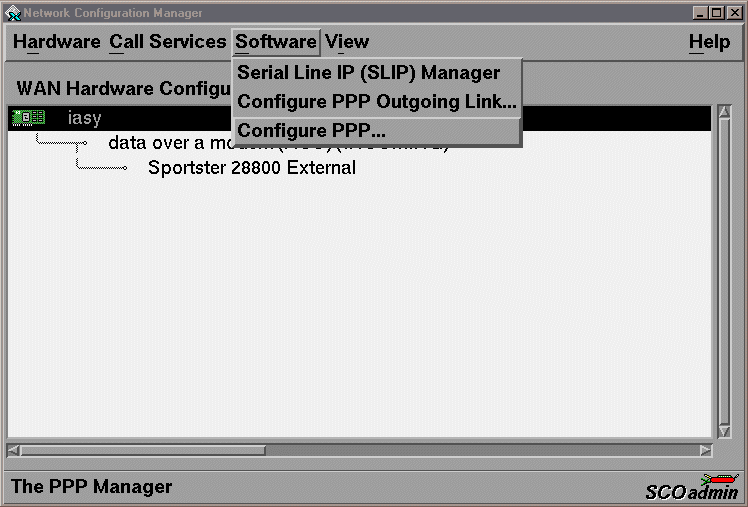
Now, in version 7.0.0 of UnixWare7, this step used to work. I will tell you to hit the "OK" button anyway, in case a ptf or upgrade fixes the problem. But this step seems to fail as of version 7.0.1.
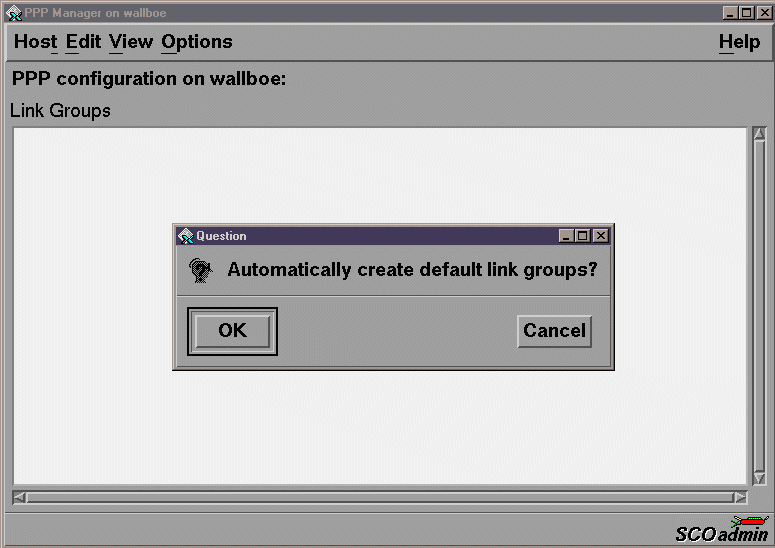
What happens, is that the creation of the link groups step, does not properly lead you into the creation of the bundles. You must perform the "Add Bundle" step manually, as shown in the message box below.
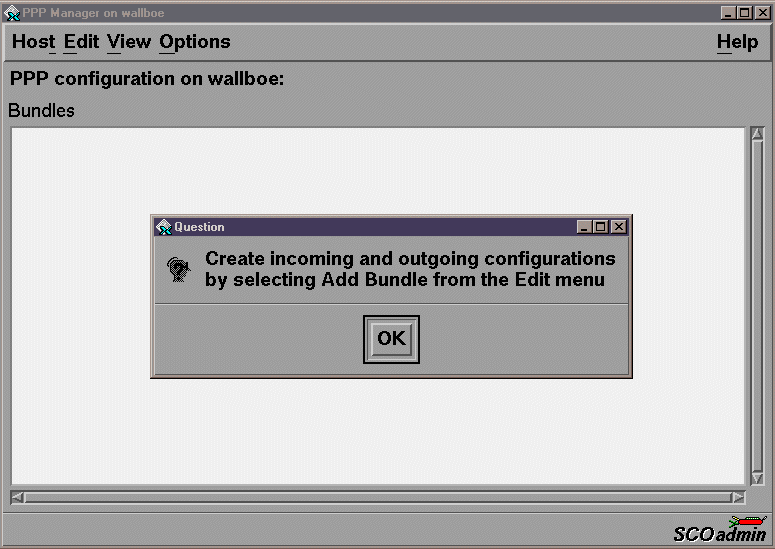
From this PPP manager, click on "Edit", then "Add", and select "Bundle". It is, in fact, your only choice at this point..
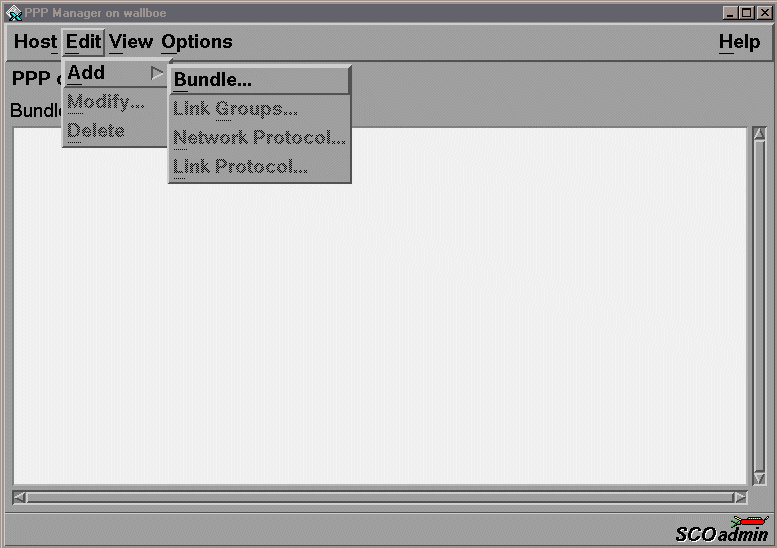
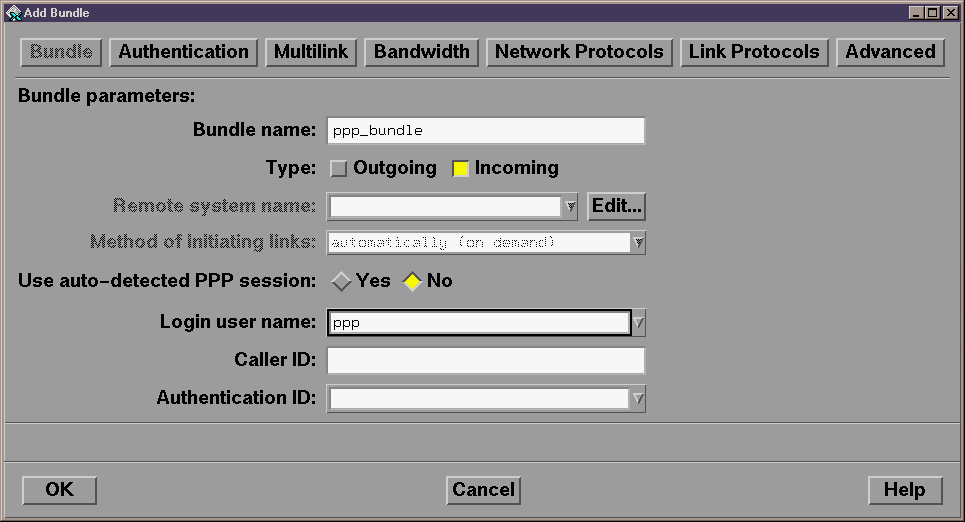
The first screen of the bundle build process, is to name the bundle, and specify its connection characteristics.
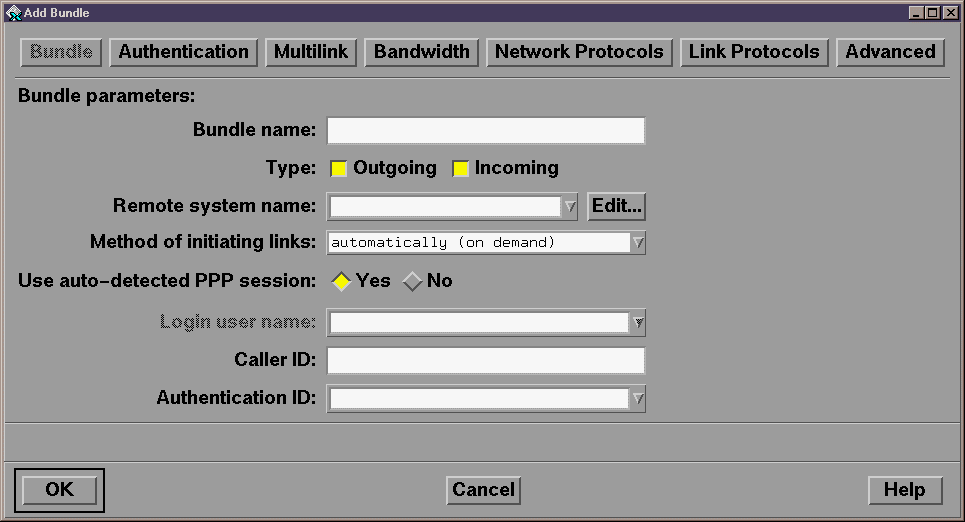
We name our bundle "ppp_bundle", although you could have "ppp_incoming" setup for incoming ppp, and "ppp_outgoing" for an outgoing bundle, etc, etc, etc. We only use one bundle, so it is simple. Again, we can only use incoming base on our previous setup options, like the modem. We are dealing only in incoming PPP. Another important step, at least for our own connections, is that we should NOT use auto detected PPP sessions. The reason for this, is that we want to be able to use this line for regular standard serial mode dial in as well. So logically we will keep everything as such. Lastly we will create a ppp login for the ppp session. This login is actually what initiates the PPP session. I use no authentication, outside of the standard login/password combo.
The screen below shows the defaults for the remaining "tabs" on the screen. You could actually click "OK" because the defaults for the rest are fine, but I will show the screen for reference information anyway.
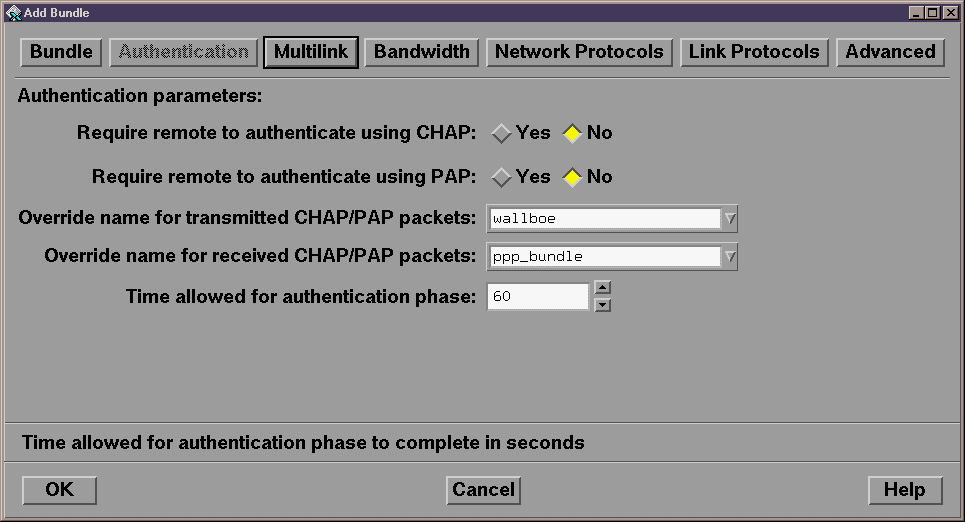
The screen below shows the defaults for the remaining "tabs" on the screen. You could actually click "OK" because the defaults for the rest are fine, but I will show the screen for reference information anyway.
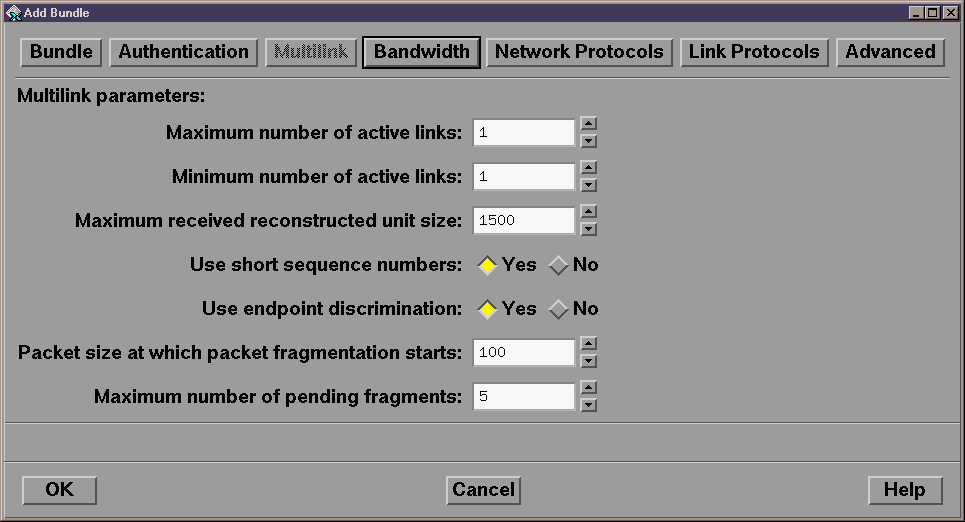
The screen below shows the defaults for the remaining "tabs" on the screen. You could actually click "OK" because the defaults for the rest are fine, but I will show the screen for reference information anyway.
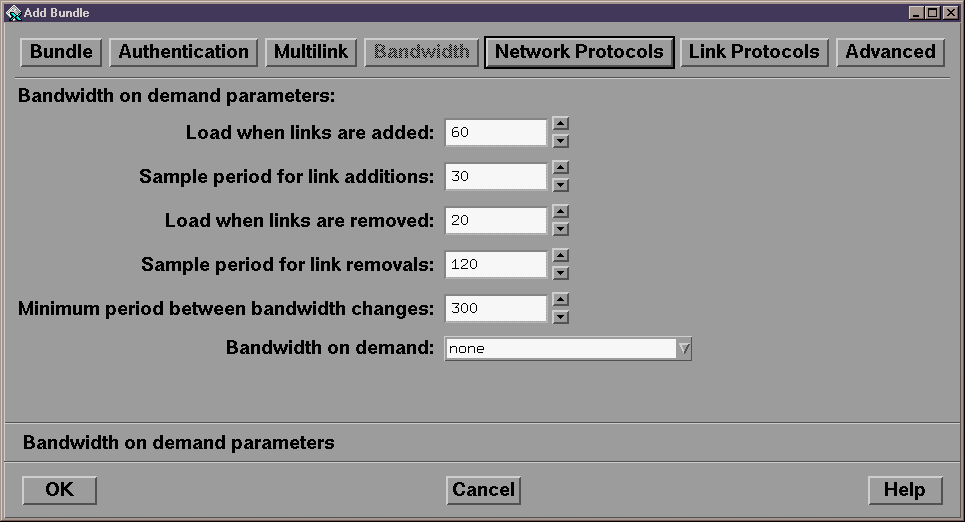
The screen below shows the defaults for the remaining "tabs" on the screen. You could actually click "OK" because the defaults for the rest are fine, but I will show the screen for reference information anyway.
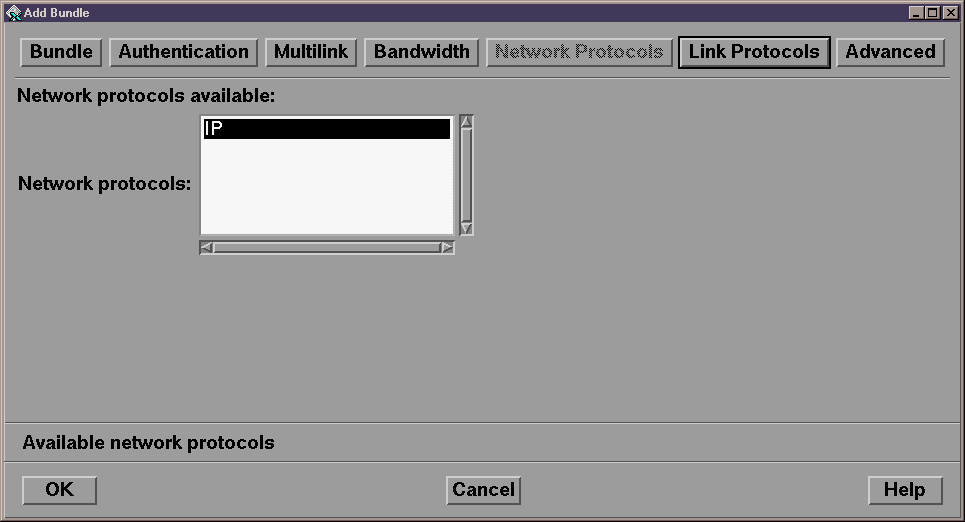
The screen below shows the defaults for the remaining "tabs" on the screen. You could actually click "OK" because the defaults for the rest are fine, but I will show the screen for reference information anyway.
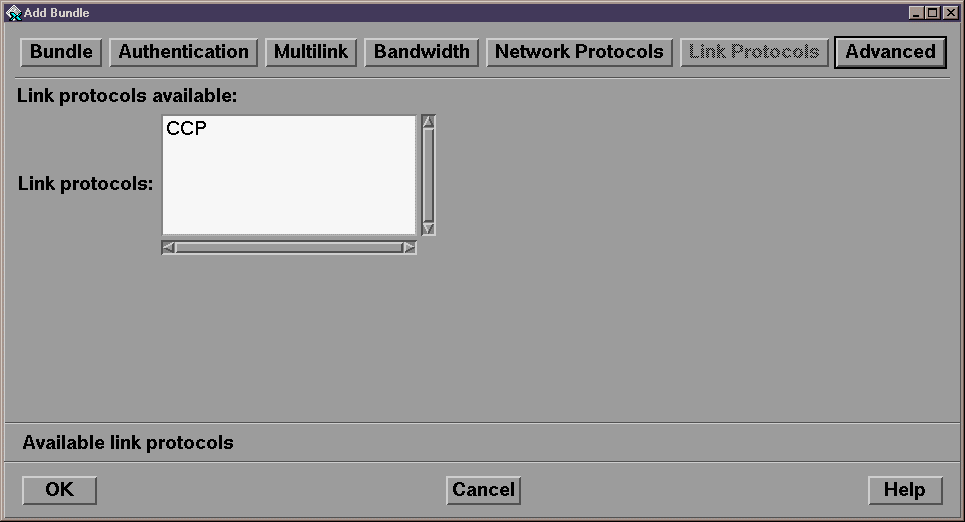
The screen below shows the defaults for the last "tab" on the screen. You can click "OK" this time, because we are done.
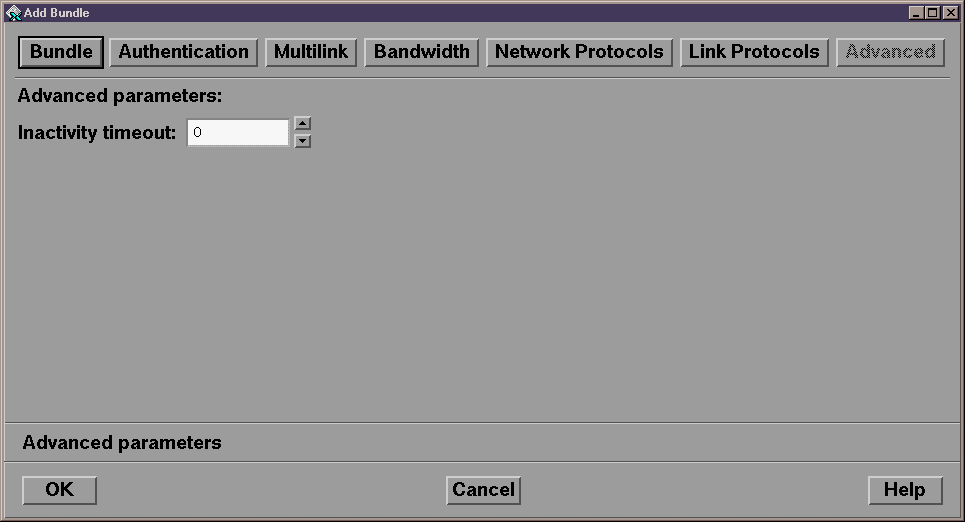
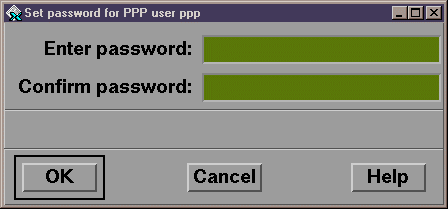
That will bring up a sub section of the "Account Manager" at this point. It will have created the "ppp" login we chose, and set its default shell to "/usr/lib/pppsh". We now need to enter a password. Anything will do.
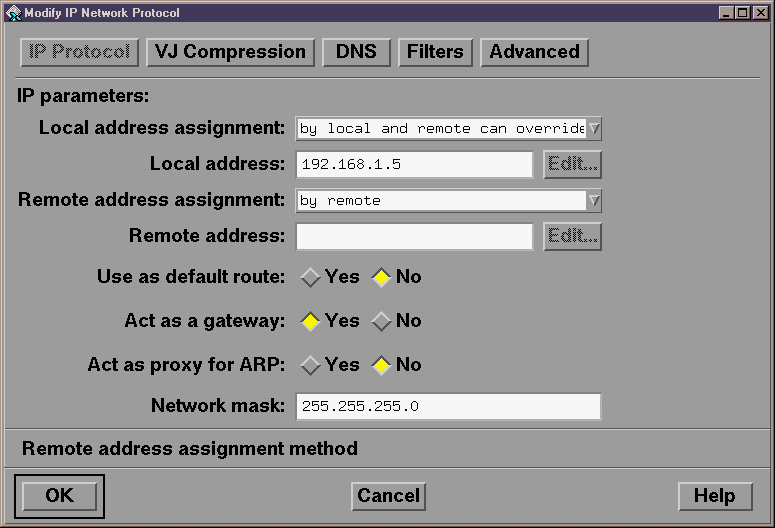
Then we are prompted thru the next phase of the setup, which is to configure the IP side of the interface. Shown are the default values. I have noticed problems sometimes with using the "Address Allocation Server" section of the assignment area. I would recommend that if you have problems with the method that follows, just use the defaults, as shown, and enter the "Address Allocation" information later. Then you can always come back and update this. I use the "Address Allocation Server" option, because if there is ever a problem with the IP, the server will simply seek the next available address, just like DHCP. It also allows you to just add modems at will, and not have any reconfiguration on the PPP side, just the address server. Very flexible this way.
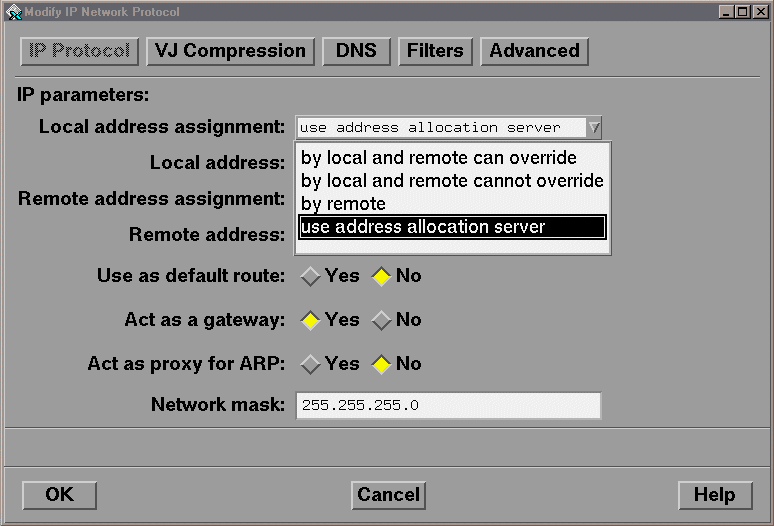
As mentioned above, I use the "address allocation server" option. Here is where and how to configure it.
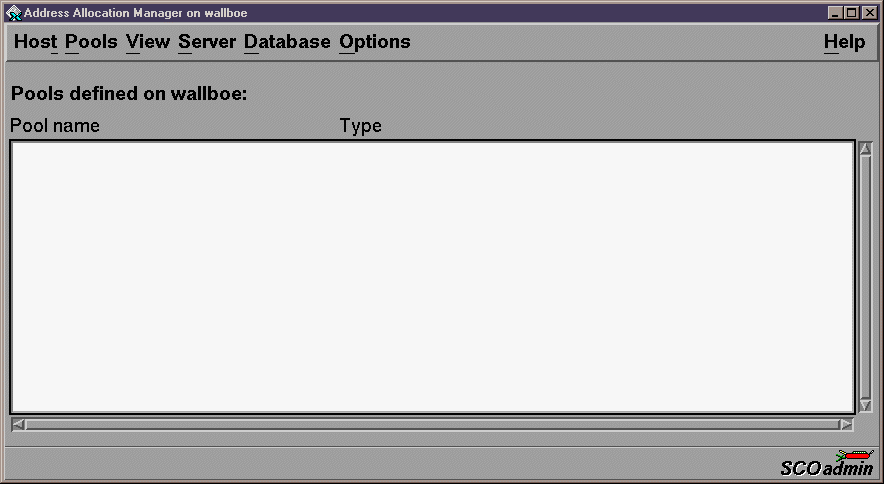
It will, of course, guide you thru the creation of these allocation units. We begin with a blank screen, showing that none are configured. If you have problems with this, and need to redo it later, this screen will likely not be blank when you reach this step again.
We must tell the manager that we want to add a new pool. We do this by clicking on "Pools" and then choosing "Add".
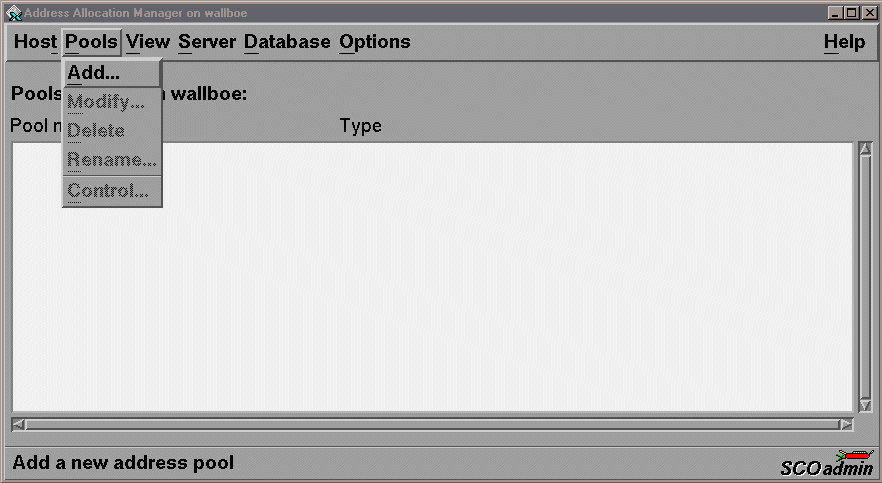
We are now shown a pool configuration tool. Begin by giving it a name that uniquely identifies this pool. I always use "Server_Side" for my server side addresses, and "Client_Side" for my non-overrideable client side remote addresses. Then just click the "Add" button after entering a "Pool name".
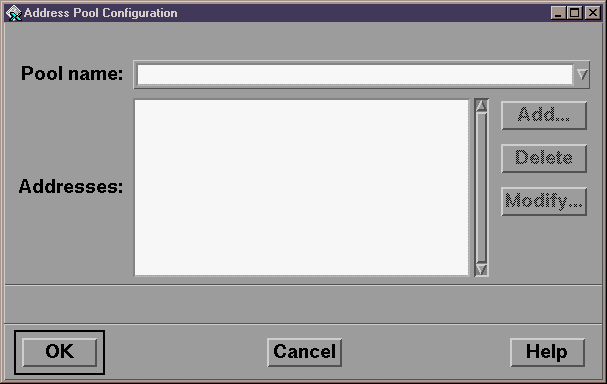
Now that we have named the pool "Server_Side", we can begin to define the IP range we will use. Since we are on a class C network, with less than 100 hosts internally, I will choose a range from 192.168.1.101, to 192.168.1.150. This is currently 50 hosts, and as you will see, it will be expandable by another 50 if we need it later. This is a judgement call on your part on how to set it up, and how many IP's you have free. Note that the default is for "Address" not "Range", so you will have to select the range radio button, to be able to use it this way.
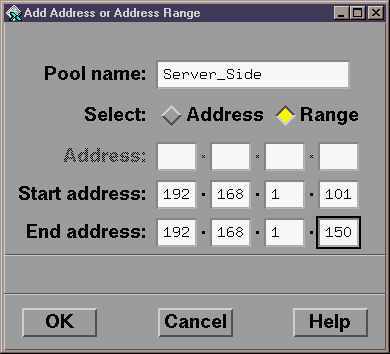
Once we complete that and click the "OK" button, we are shown the updated pool information, in the pool config tool. If we like this, we can click the "OK" button. If not we can "Modify" it again, "Delete" it altogether, or just "Cancel" out. We clicked "OK".
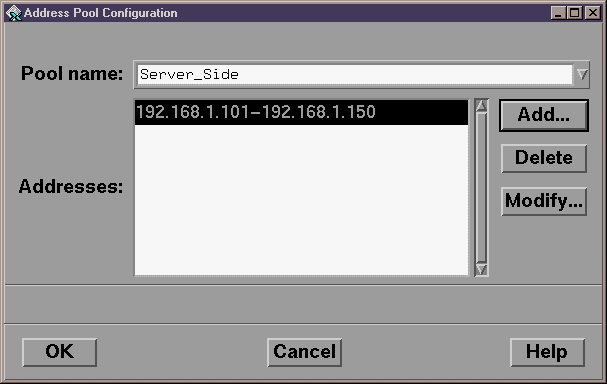
That completes that section of the pool configuration tool, and updates our "Address Allocation Server" view, to show such.
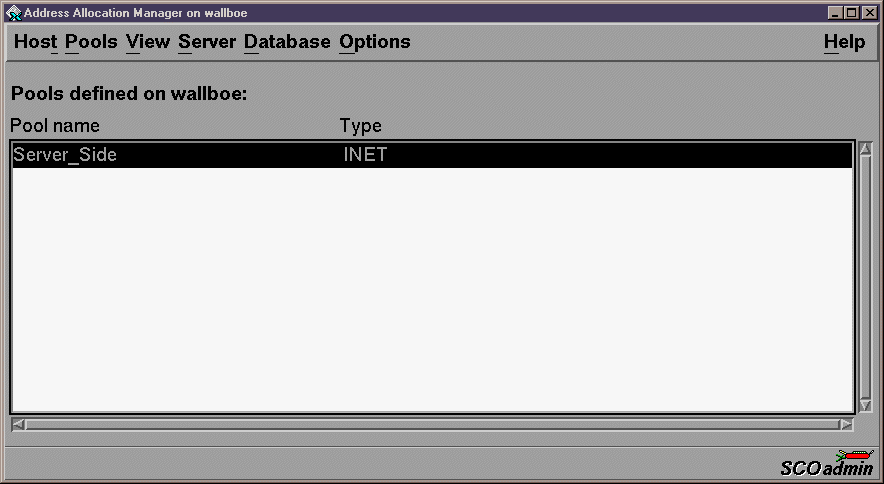
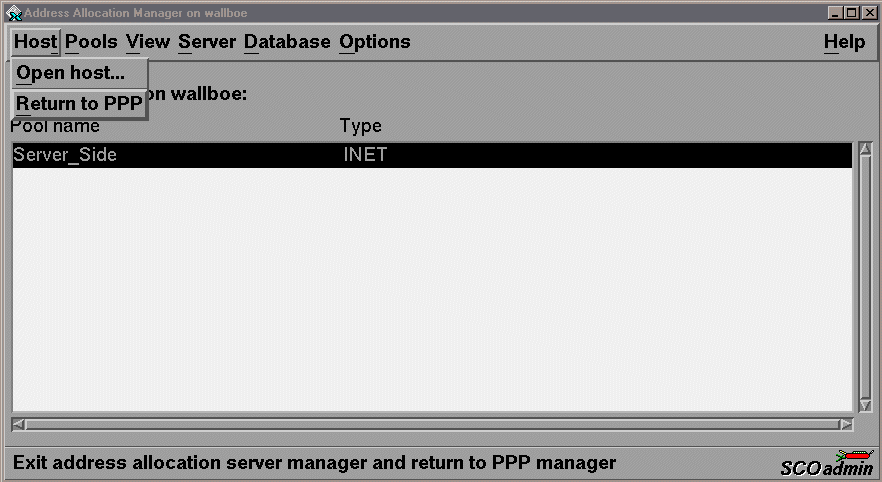
Now, while we are currently highlighting the "Server_Side" pool, we will exit this manager, and "Return to PPP". This will , in effect, plug this pool name into our IP protocol configuration tool.
We will also need to add the "Client_Side" pool, so follow similar steps to above mentioned steps, just changing the following values.
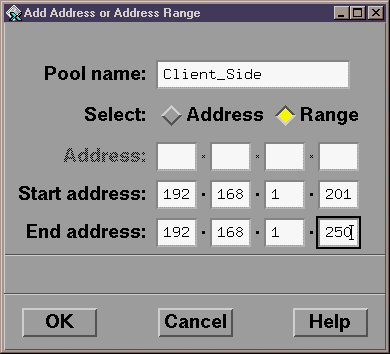
This the "last chance" screen on the "client_side" pool config tool, to accept or cancel. We will click "OK" to accept this pool.
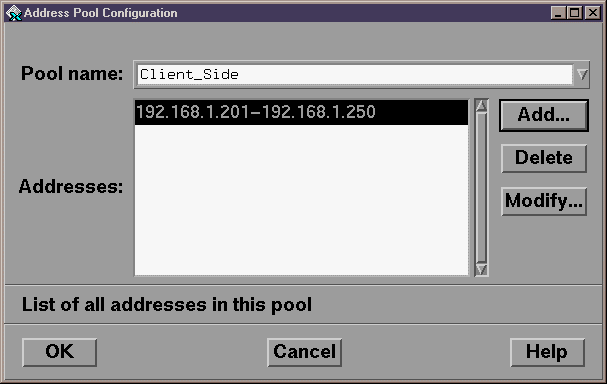
Our "Address Allocation Manager" screen now shows the two pools and their ranges (if you double click the pool name). We need to highlight the "Client_Side" pool, and .....
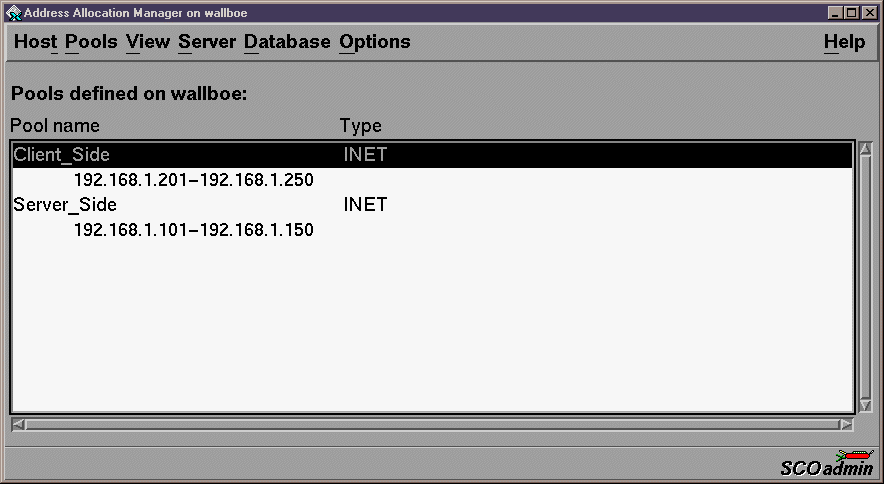
Return to the PPP configuration. (As an observant viewer may notice, now this screen shows "Exit" not "Return to PPP", which indicates I myself, had problems, and had to do this after the fact. - I have shown it back in this order for "seamless" directions, even though this particular step was exectued later.)
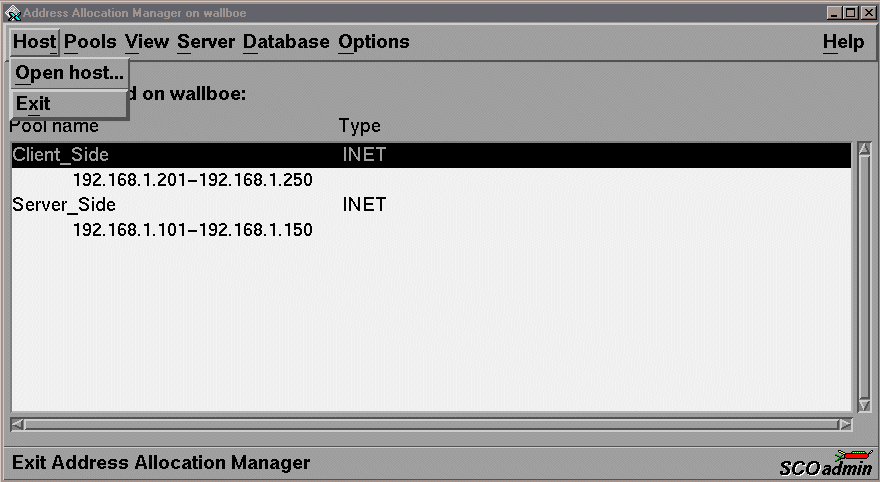
The final IP protocol tab section of the screen is shown below. As you can tell, I wont have to come back in here again, if I need to change the IP ranges. They can be done directly from the "scoadmin" screens "Address Allocation Manager" section under "Networking". This will leave our PPP untouched from the time we set it up, until an O/S upgrade. This makes for clean neat work. Also note, that I have found a problem with using the UnixWare7 box as a proxy for ARP. It works the first time you log in, but each successive login fails after that. To get around this issue, we have modified the ppp user's ".profile". Since that is the user that spawns the ppp session, we can do such. It seems that the "permantly published" flag that arp gives, is not truly permanent. The script will show how we beat this.
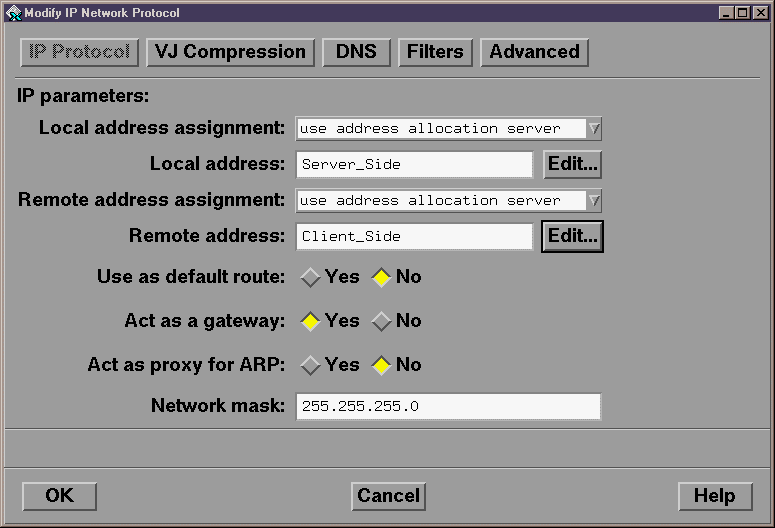
(I show this next screen, merely as a temp fix. When I had problems with my initial configuration, I used values as shown below to get me thru the install of PPP, then updated them later.)
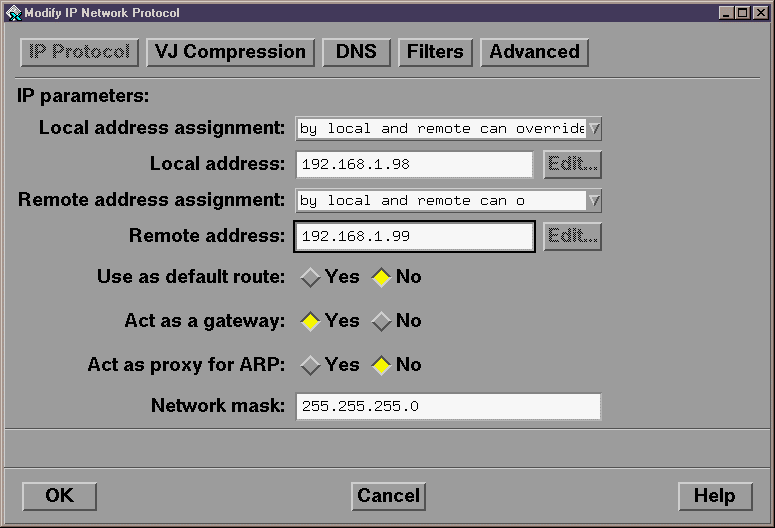
I have to turn of VJ compression for use with the modems in our office.
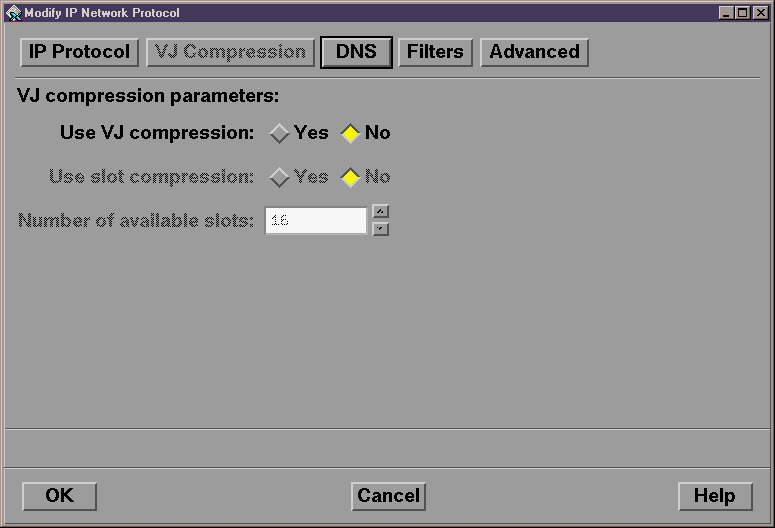
These defaults will be fine, and are shown for informational purposes only.
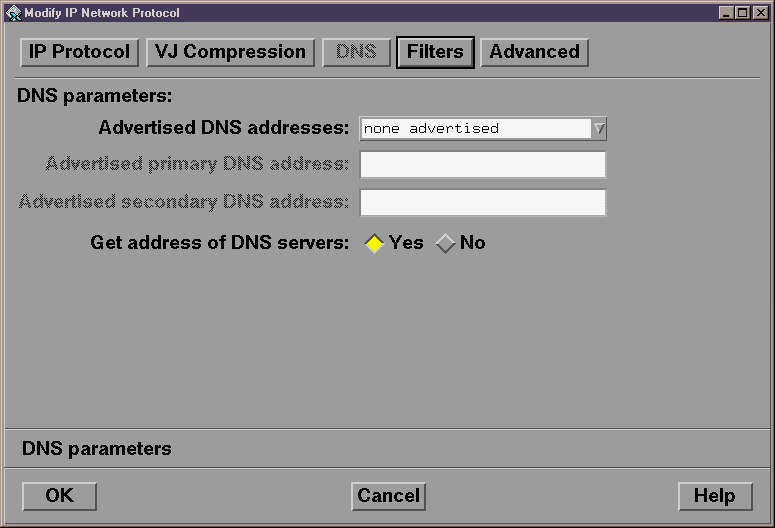
The defaults are fine as is, and are shown for informational purposes only.
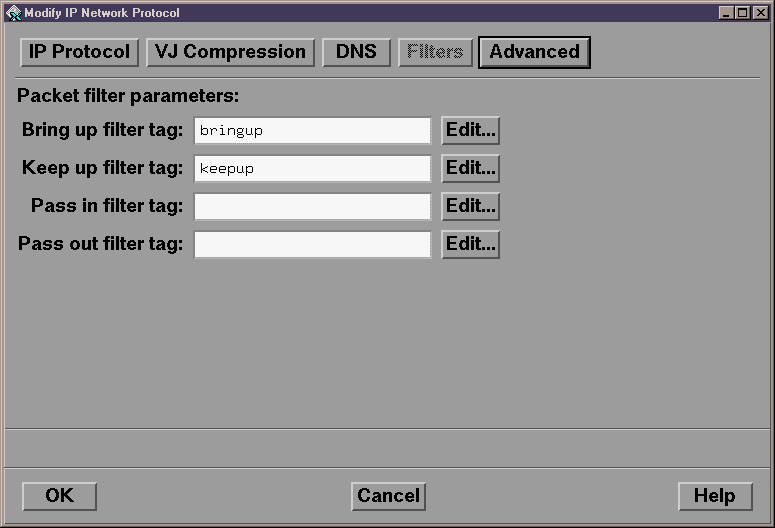
The defaults are fine, and are shown for informational purposes only. Click "OK" when complete.
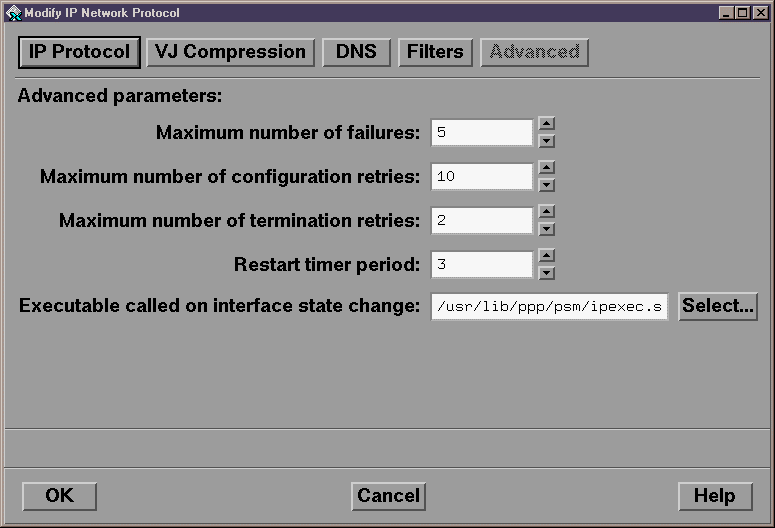
When we click "OK" on the screen above, we are asked which link groups to use. Now, since the step in the beginning of this process fails the link group creation, we just "Cancel" this step, and do it manually.
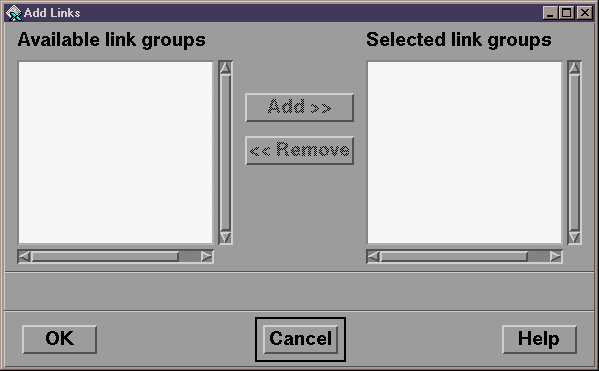
The followin screen is we get to see after the "Cancel" option on the link groups. We must switch to link group view to be able to add the new link groups however. This is accomplished by clicking on "View" and then "Link Groups" from there.
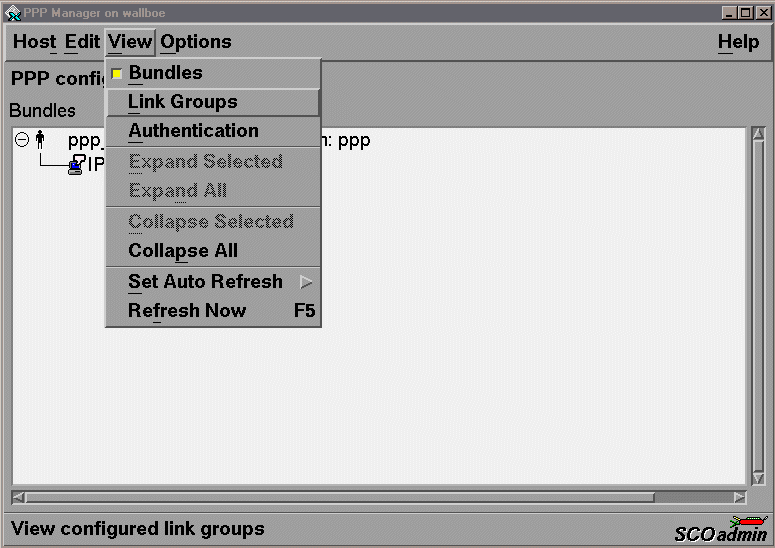
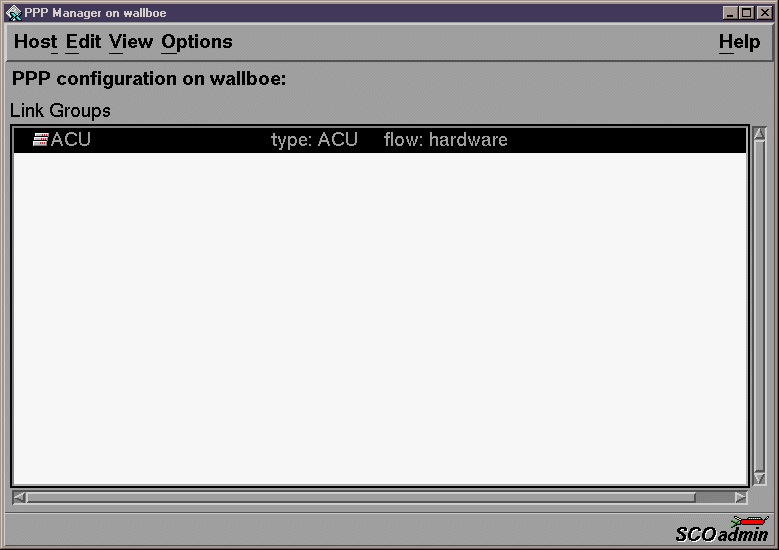
When we do this, we notice the following group in place.
We will just modify this one that is there now. Click on "Edit" and then "Modify" for this.
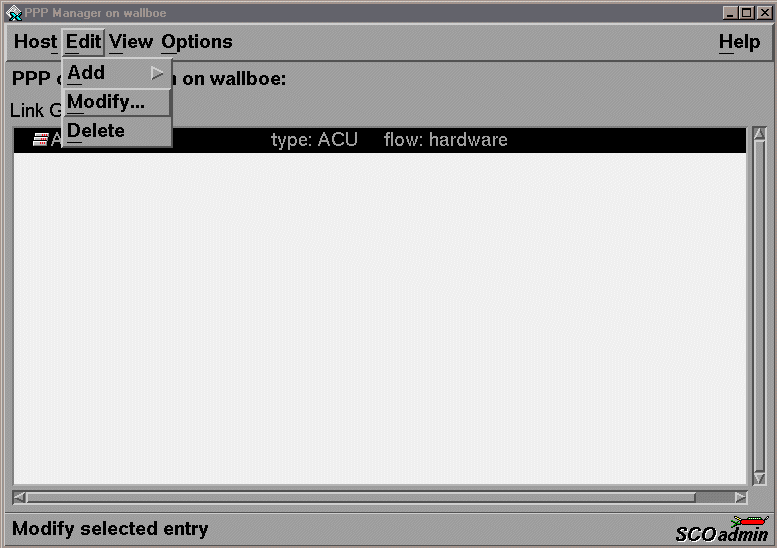
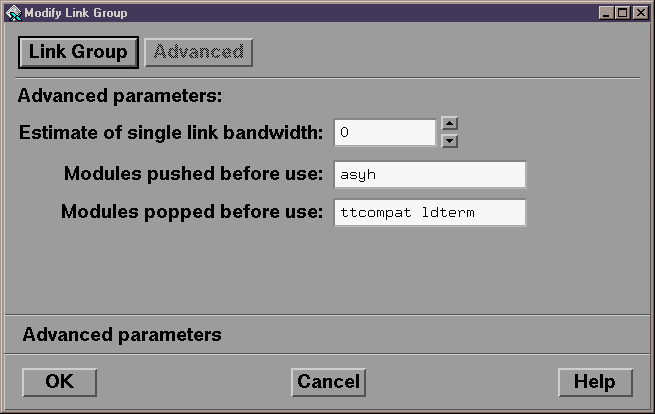
As it turns out, this group is fine as is. The following two screens are for reference information only.
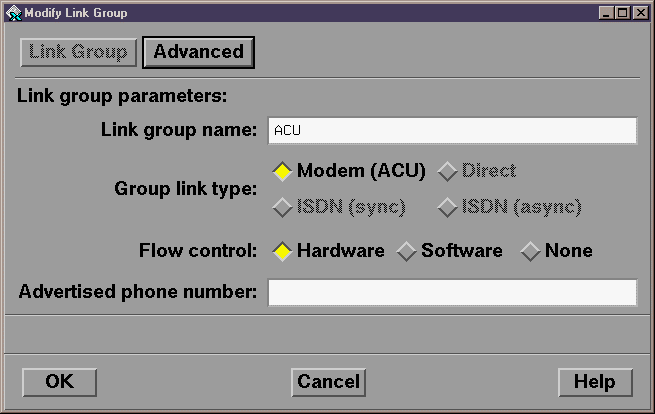
Again, for reference only. Dont change settings.
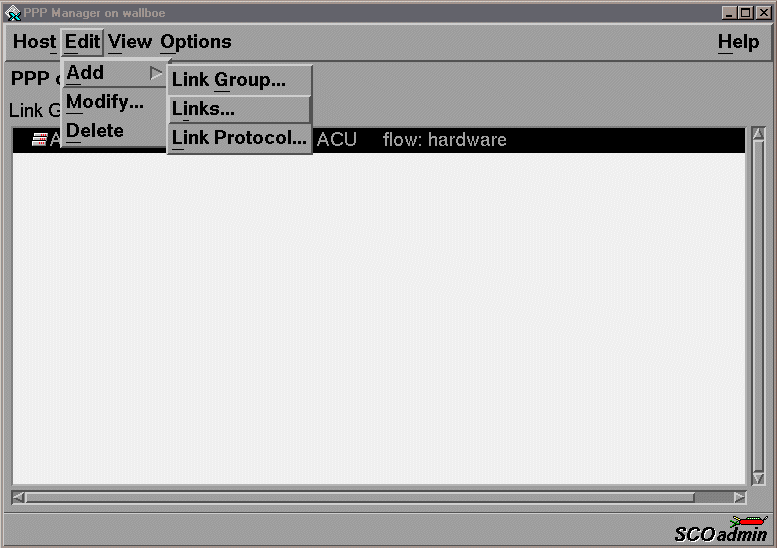
Now lets "link it up !". To do this, we click on "Edit" then "Add" and then "Links". This will of course, create the link.
What we need to do now, is to tell the PPP setup, that /dev/term/00m is to be linked to this bundle/link group. It is available so lets use it. All we need to do to accomplish this, is to select it in the left hand pane, and either double-click it, or just click the "Add" button.
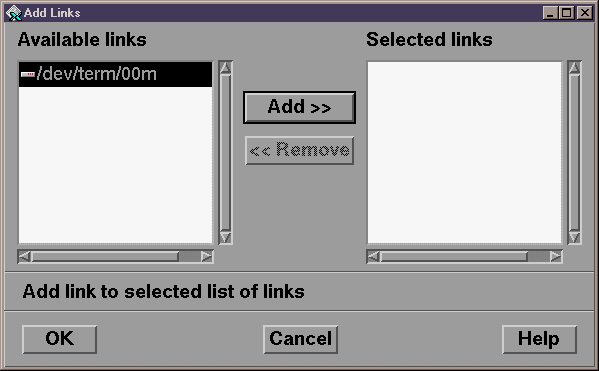
Now we see that we have successfully linked the /dev/term/00m device and the IP stack to our link group "ACU".
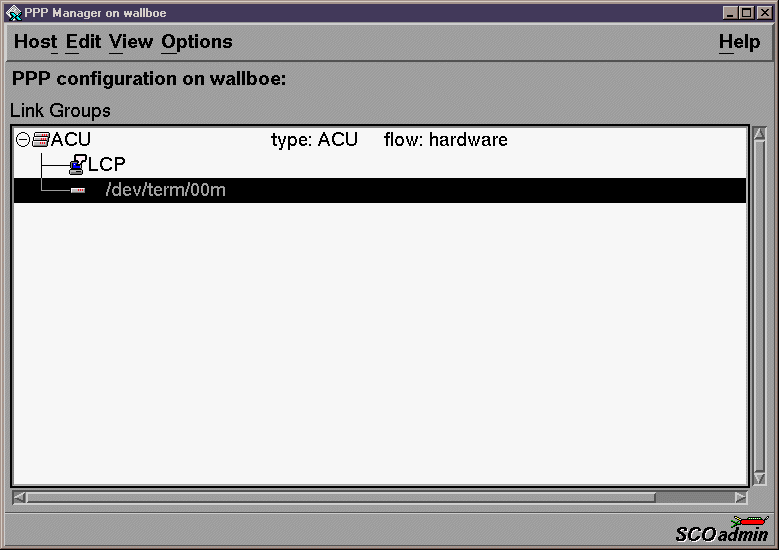
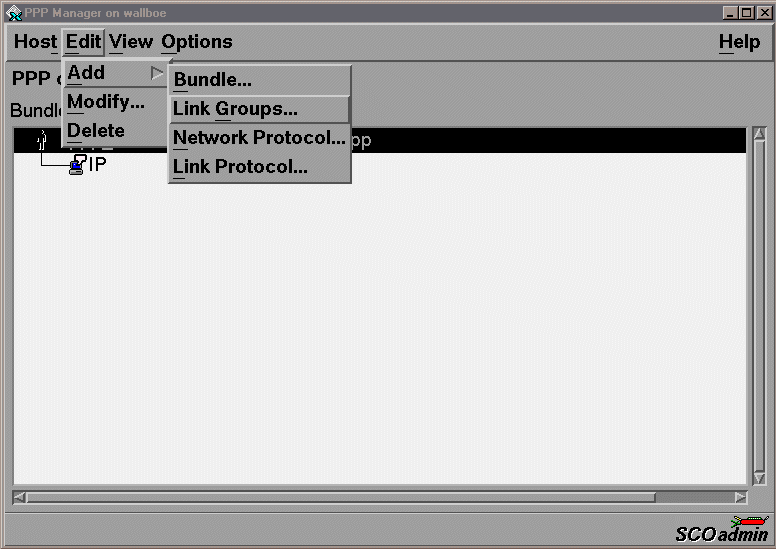
Now we must switch back to Bundle view, as you should be able to figure that out. After doing that, we must add a new link group to the bundle. We do this by clicking on "Edit" then "Add", then "Link Group".
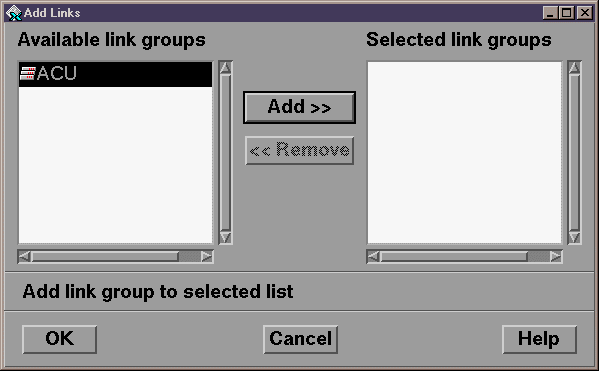
We have the "ACU" link group available to us, so similar to the link for the device above, we link the group now. Just click the "Add" button after selecting the "ACU" group.
The dialog box, will now look like this :
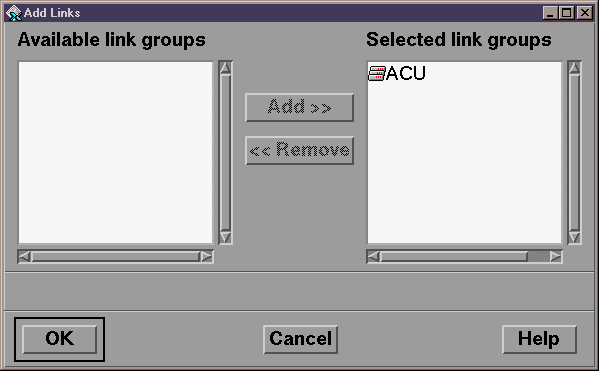
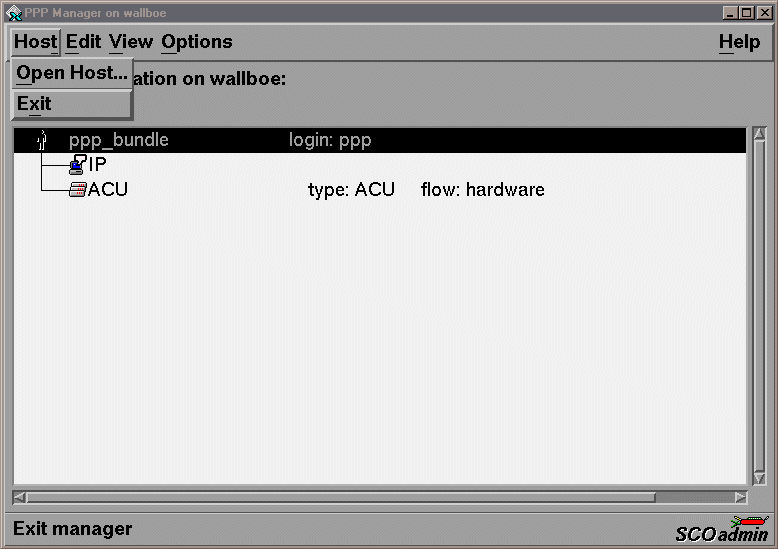
Just click "OK" at that poing and our bundle view now shows the IP stack and the link group, altogether as desired. We can now exit this area, by clicking on "Host" and then "Exit".
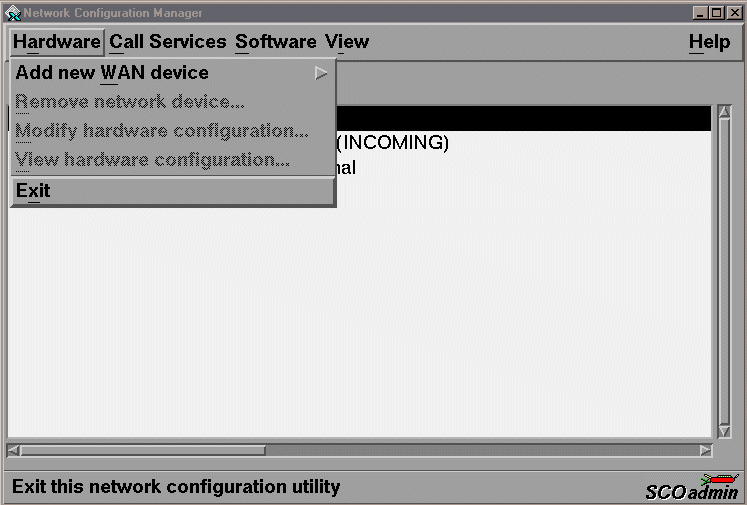
Well, that about does it. We can exit the Network configuration manager by clicking on "Hardware" and then "Exit".
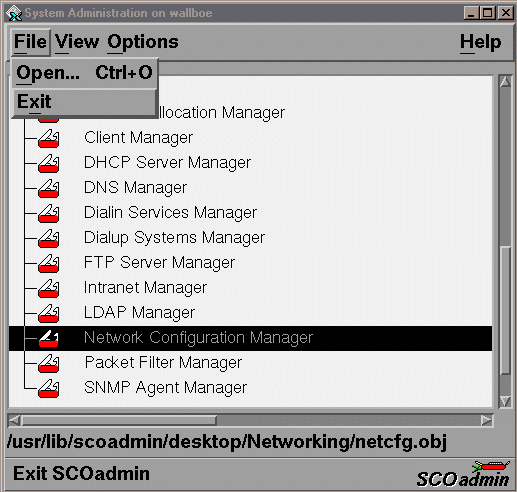
And lets exit the "scoadmin" tool by clicking on "File" and "Exit".
This page last updated 04/09/1999.